
Table of Contents
- Why Shoulder Pain While Hiking Happens
- How to Adjust Backpack Straps for Comfort
- Backpack Weight Distribution Tips That Actually Work
- Posture Correction and Trekking Pole Technique
- Stretches for Hikers to Relieve Shoulder Tension
- Upper Body Conditioning to Prevent Shoulder Pain While Hiking
- Gear Choices That Reduce Shoulder Strain
- Conclusion
Last Updated: August 27, 2026
Why Shoulder Pain While Hiking Happens
Shoulder pain during hikes stems from poor load management, misaligned gear, and undertrained stabilizer muscles. The problem isn’t a single issue but a cascade of failures: improper pack fit, weight distributed to wrong structures, and postural collapse under sustained load. This guide breaks down the anatomy, gear mechanics, and conditioning work that separates a painful slog from a strong, comfortable day on the trail.
The Anatomy of Hiker’s Shoulder
Hiker’s shoulder is a cluster of symptoms, aching, burning, numbness, and tingling down the arm, caused by sustained compressive and tensile stress on the shoulder girdle during loaded hiking. The trapezius muscle, brachial plexus, and soft tissues surrounding the scapula are most commonly affected. When a pack pulls down and forward on shoulder straps for hours, the upper trapezius contracts continuously to resist that pull, leading to muscle fatigue, ischemia, and deep ache. The brachial plexus, the nerve network running from the cervical spine through the shoulder into the arm, is especially vulnerable when pack straps compress the area below the collarbone, producing tingling or numbness, a signal to stop and adjust immediately.
According to American Physical Therapy Association guidance on musculoskeletal load, sustained compressive loads on soft tissue without adequate rest are a primary driver of repetitive strain injuries in recreational athletes.
How Pack Geometry Affects Your Shoulder Girdle
Pack geometry refers to how the frame, panel, and harness position weight relative to your body’s center of gravity. A frame sitting too low forces load to pull away from your back, transferring stress directly onto shoulder straps. A pack that’s too tall creates a high center of gravity, pulling you backward and forcing compensatory forward lean that loads the thoracic spine. The shoulder girdle is built for mobility, not weight-bearing. Every design decision in a properly engineered pack shifts load away from the shoulder girdle and onto the pelvis.
How to Adjust Backpack Straps for Comfort
Proper pack fitment is the single highest-impact intervention for preventing shoulder pain. A well-fitted pack outperforms an expensive pack that’s never been dialed in. Start with torso length, measured from the C7 vertebra at the base of your neck to the iliac crest of your hip, which determines the correct frame size.
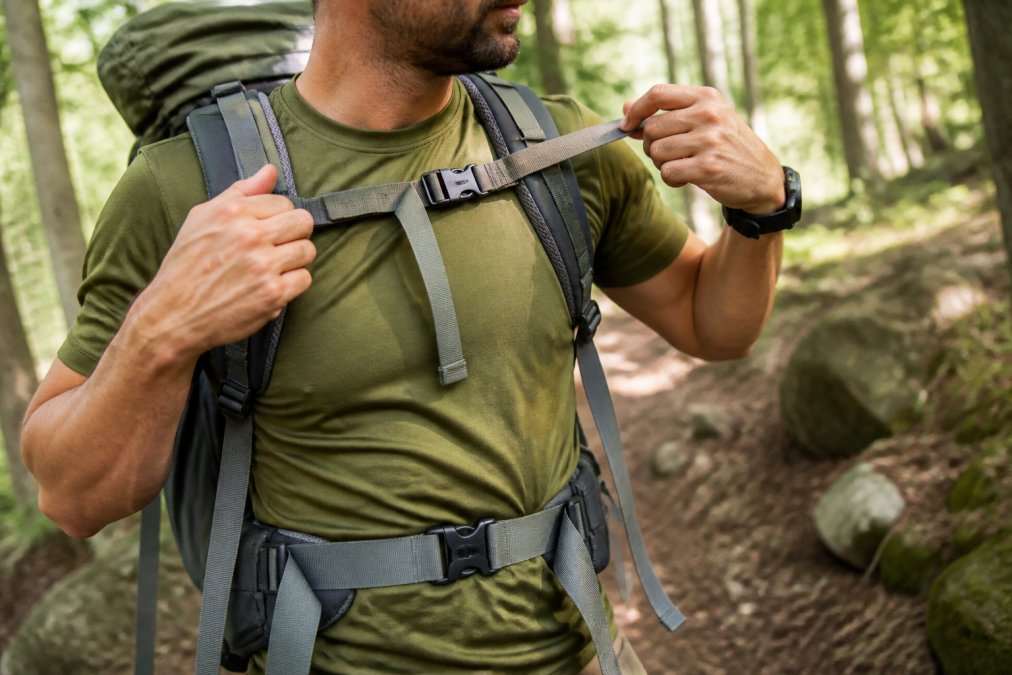
Hip Belt, Load Lifters, and Sternum Strap
Follow this sequence every time you put on a loaded pack:
- Loosen all straps before putting the pack on.
- Position the hip belt so the top edge sits just above your iliac crest. Buckle and tighten until the belt wraps firmly around your hips, not your waist.
- Tighten the shoulder straps until they make full contact with your shoulders without gaps, but should not bear the majority of load yet.
- Adjust the load lifters until they form roughly a 45-degree angle. Too loose and the pack sags; too tight and they create pressure points.
- Clip and snug the sternum strap across your chest, positioned about an inch below your collarbone. This prevents shoulder straps from splaying outward, reducing lateral pressure on the brachial plexus.
- Re-check hip belt tension after shoulder straps are set. The goal is 70-80% of pack weight on your hips.
After the first mile, stop and re-adjust. Packs settle as contents shift and your body warms up. That five-minute stop often makes the difference between comfort and pain.
Strap Material and Friction Management
Foam-backed nylon webbing creates friction against moisture-wicking base layers, causing the strap to grip fabric rather than move with your body. Over a long day, that micro-friction translates into skin irritation and localized pressure hotspots on the trapezius. Higher-end packs use perforated foam or mesh-covered shoulder straps that reduce contact area and allow airflow. Wearing a close-fitting merino base layer rather than a loose synthetic tee also reduces strap movement.
Backpack Weight Distribution Tips That Actually Work
Treat the inside of your pack as a weight management system. Where you place items changes your center of gravity, posture, and how much stress lands on your shoulders.
The 20% Rule and Center of Gravity
Pack weight should not exceed roughly 20% of your body weight for multi-day trips (apta.org). The more important principle is center of gravity placement: heavy items, food, water, bear canisters, tent bodies, should sit close to your spine in the middle-to-upper portion of the main compartment. This keeps the center of gravity high and close to your body’s own center, reducing the backward moment arm that pulls on shoulder straps. Lighter items go at the bottom and outside pockets.
Never hang heavy items from the outside of your pack using carabiner clips. External weight swings with each step, creating dynamic loading that multiplies stress on shoulder straps and spinal structures.
Ultralight vs. Traditional Pack Geometry
Traditional packs use rigid internal frames to transfer load to the hip belt, working well for loads above roughly 25 pounds (the CDC). Ultralight packs often eliminate the rigid frame, relying on frameless construction that requires the user to pack a sleeping pad as a structural element. For loads under 20 pounds, this works; above that threshold, frameless packs concentrate load on shoulder straps. If carrying more than 25 pounds, a framed pack is the correct choice.
Posture Correction and Trekking Pole Technique
Posture collapse is cumulative. By mile ten, most hikers are hunched forward with rounded shoulders and dropped chin, compressing the thoracic spine and forcing the trapezius to work overtime. Every 30-45 minutes, perform scapular retraction: pull your shoulder blades together and slightly down, hold five seconds, then release. This resets the shoulder girdle and restores thoracic spine extension.
Trekking poles shift propulsive work from legs to arms on climbs and absorb ground-reaction forces on descents. Adjust pole length so your elbow is at roughly 90 degrees when the pole tip contacts the ground on flat terrain. Shorten by 5-10 cm for steep ascents; lengthen by the same amount for descents.
Trekking poles reduce compressive load on your shoulder girdle by distributing effort across four contact points instead of two.
Stretches for Hikers to Relieve Shoulder Tension
Stretching strategy matters as much as the stretches themselves. Dynamic stretching before a hike prepares tissue for load; static stretching after accelerates recovery.
Pre-Hike Dynamic Stretching Routine
Perform these movements before putting the pack on:
- Arm circles, 10 forward, 10 backward, increasing range progressively.
- Shoulder rolls, 10 forward, 10 backward, focusing on full elevation and depression.
- Thoracic rotations, Stand with feet shoulder-width apart, cross arms over chest, rotate upper body left and right 10 times each direction.
- Band pull-aparts, Clasp hands behind your back, squeeze shoulder blades together, and lift arms slightly while opening the chest. Hold two seconds, repeat 10 times.
- Neck lateral flexion, Slowly tilt the right ear toward the right shoulder, hold three seconds, return to center, repeat on the left. Five reps each side.
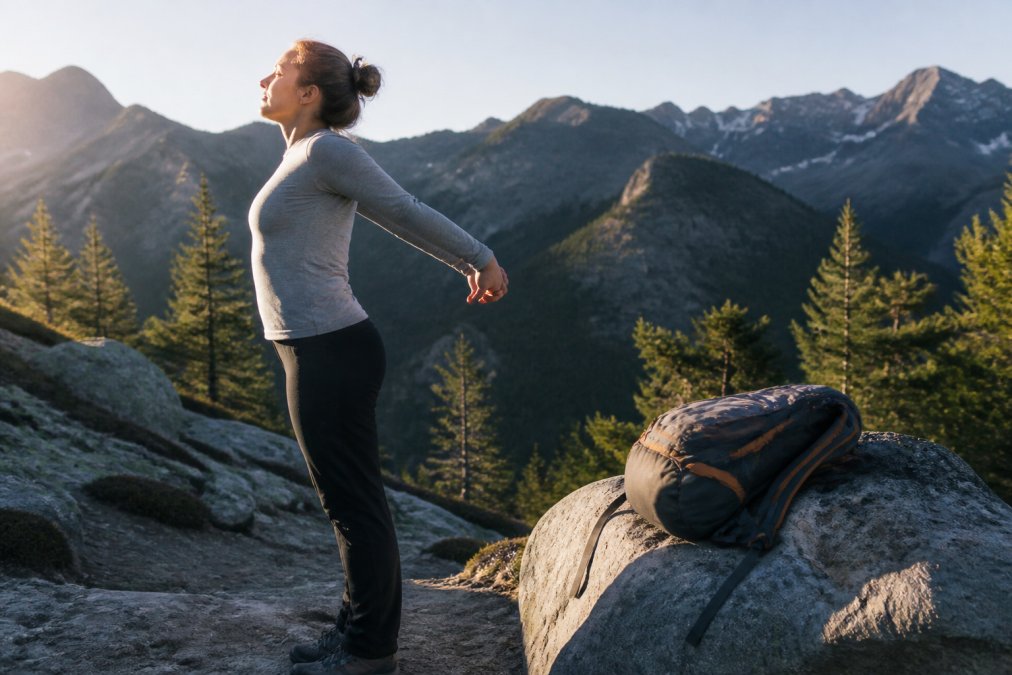
Post-Hike Static Stretching for Recovery
Hold each stretch for 30-45 seconds after the hike, when tissue is warm:
- Cross-body shoulder stretch, Pull one arm across the chest and hold with the opposite hand.
- Doorway chest stretch, Place forearms on a doorframe and lean forward gently.
- Upper trapezius stretch, Tilt the head to one side and apply gentle downward pressure with the same-side hand.
- Thread-the-needle, From hands and knees, slide one arm under the body and lower the shoulder toward the floor.
- Child’s pose with arm reach, Extend arms forward and allow the thoracic spine to decompress. Hold for 60 seconds.
| Stretch | Type | Duration | Target Area |
|---|---|---|---|
| Arm circles | Dynamic | 20 reps | Shoulder girdle |
| Thoracic rotations | Dynamic | 10 reps each side | Thoracic spine |
| Cross-body shoulder | Static | 30-45 sec each side | Posterior shoulder |
| Doorway chest stretch | Static | 30-45 sec | Pectorals, anterior shoulder |
| Upper trapezius stretch | Static | 30-45 sec each side | Trapezius muscle |
| Thread-the-needle | Static | 30-45 sec each side | Thoracic rotation |
Upper Body Conditioning to Prevent Shoulder Pain While Hiking
Trail fitness requires more than cardio. The muscles that stabilize the scapula, maintain thoracic extension, and control the shoulder girdle under load need specific training. Most hikers train the muscles visible in the mirror: chest and biceps. What actually prevents shoulder pain is strength in the posterior chain: the lower and middle trapezius, rhomboids, serratus anterior, and rotator cuff.
Movements that build trail-specific shoulder stability:
- Dumbbell rows, Unilateral rows train the rhomboids and lower trapezius, resisting forward rounding under pack load. Three sets of 10-12 reps, two to three times per week.
- Face pulls, Using a cable machine or resistance band, pull handles toward your face with elbows high. Three sets of 15.
- Prone Y-T-W raises, Lying face-down, lift arms into Y, T, and W positions to train the lower trapezius and serratus anterior.
- Dead hangs, Hanging from a pull-up bar for 20-30 seconds decompresses the shoulder joint and builds grip endurance.
- Farmer carries, Walking with heavy weights in each hand trains core stability and conditions the shoulder girdle for sustained loaded carriage.
Core stability maintains lumbar extension under load, keeping the thoracic spine from collapsing forward.
Gear Choices That Reduce Shoulder Strain
Beyond pack fit, specific gear decisions meaningfully reduce load on shoulder structures. The Adventurers Pulse range of tactical backpacks is engineered with load-transfer systems and harness geometry designed to keep weight on your hips.
When evaluating any pack, look for:
- Contoured, padded hip belt, Anatomically shaped belts transfer more load than flat ones.
- Adjustable torso length, Fixed-length torsos fit a narrow range of bodies.
- Load lifter straps, Essential for packs over 25 liters.
- Ventilated back panel, Creates airspace between your back and pack, reducing heat and moisture that cause strap friction.
Hydration Bladder Hose Routing
Most hikers clip the hydration bladder hose to the same shoulder strap they bite from, typically the left. Over a full day, the weight of the hose, clip, and mouthpiece pulls that strap forward and down, creating asymmetric loading that produces cumulative torque on the shoulder girdle. Route the hose through the dedicated port inside the pack, then clip it to the shoulder strap at the top, not mid-strap. If your pack has a sternum strap hose clip, use it. A full 3-liter hydration bladder adds roughly 6.6 pounds, carry it high and centered, against the back panel.
| Strategy | Primary Benefit | When It Matters Most |
|---|---|---|
| Hip belt fitment | Transfers 70-80% of load to hips | Every hike over 5 miles |
| Load lifter adjustment | Keeps pack close to spine | Loads over 25 lbs |
| Heavy items centered and high | Reduces backward moment arm | Multi-day trips |
| Scapular retraction breaks | Resets trapezius fatigue | Every 30-45 minutes |
| Pre-hike dynamic stretching | Prepares tissue for load | Before every hike |
| Post-hike static stretching | Accelerates muscle recovery | After every hike |
| Posterior chain strength training | Builds structural resilience | Year-round conditioning |
| Hydration hose routing | Prevents asymmetric loading | All-day hikes |
Shoulder pain on the trail is one of the most preventable problems in hiking and one of the most commonly ignored until it becomes chronic. The combination of proper pack fitment, deliberate weight distribution, regular posture resets, and consistent conditioning work gives your body the structural resilience to handle long days under load.
Adventurers Pulse builds gear engineered for sustained performance, with load-transfer systems, contoured hip belts, and harness geometry designed to keep weight where it belongs. Shop Now and find the pack that fits your body, your load, and the trails you’re chasing.
Frequently Asked Questions
Q: Why does my shoulder hurt when hiking?
A: Shoulder pain while hiking usually comes from one of three sources: a poorly fitted pack that shifts load onto the trapezius muscle instead of the hips, poor posture that rounds the thoracic spine and compresses the brachial plexus, or muscle fatigue from carrying more weight than your upper body is conditioned to handle. Old injuries can amplify all three. Fixing pack fitment and load distribution resolves the issue for most hikers before conditioning even becomes a factor.
Q: How should a hiking backpack fit to avoid shoulder strain?
A: A properly fitted pack sits the hip belt squarely over your iliac crest so your hips carry roughly 70-80% of the load. The shoulder straps should wrap close to your body without gaps, and load lifter straps should angle upward at about 45 degrees from the pack to your shoulders. The sternum strap keeps the shoulder straps from spreading wide. If the shoulder straps are bearing the bulk of the weight, the hip belt needs to be repositioned or the torso length adjusted.
Q: What is the 20% rule for backpacking?
A: The 20% rule states that your loaded pack should weigh no more than 20% of your body weight. For a 160-pound hiker, that is a 32-pound maximum. Carrying more than this significantly increases muscle fatigue, compresses the shoulder girdle, and raises injury risk on long hikes. Ultralight hikers often target 10% or less. Audit your pack contents before each trip and cut items that don't serve a clear purpose to stay within a safe range.
Q: What exercises help prevent shoulder pain while hiking?
A: Scapular retraction exercises, rows, and face pulls strengthen the muscles that stabilize your shoulder girdle under load. Core stability work, planks and dead bugs, reduces how much your upper body compensates for trunk weakness on uneven terrain. Chest-opening stretches improve thoracic spine mobility and counteract the forward-hunched posture that builds up over miles. Aim to train these two to three times per week in the weeks before a multi-day trip.
This article was written using GrandRanker



0 Comments